Winter Photography Tips: Capturing the Beauty of the Season
Winter is a magical time for photography, especially when the world is covered in a blanket of snow. The serene landscapes and soft light of the season offer a unique canvas for capturing breathtaking wintery scenes. In this blog post, we’ll explore some essential tips and techniques for capturing the beauty of winter through photography. From mastering exposure in snowy landscapes to utilizing natural light and reflections, we’ll cover everything you need to know to take your winter photography to the next level. Whether you’re a novice or an experienced photographer, these tips will help you create stunning images that truly capture the essence of the season. So, grab your camera and join us as we delve into the world of winter photography and learn how to add warmth and depth to your wintery photos.
Choosing the Right Camera Settings
When capturing the perfect winter shot, it’s essential to have a good grasp of your camera settings. One of the most important settings you need to consider is the shutter speed. A faster shutter speed can help to freeze action, which is particularly important when shooting dynamic winter scenes such as snowboarding or skiing. On the other hand, a slower shutter speed can create a dreamy effect in your photos, especially when capturing falling snowflakes or a winter landscape.
Another crucial setting to consider is the aperture. A wider aperture (smaller f-stop number) allows more light to enter the lens, which is perfect for low light situations in the winter. On the other hand, a narrower aperture (larger f-stop number) can create a greater depth of field, making it ideal for capturing a vast, snowy landscape.
Additionally, the ISO setting is key in adjusting the camera’s sensitivity to light. In darker winter conditions, you may need to increase the ISO to capture more light, but be wary of introducing too much noise in your images. Understanding how to balance these three settings is crucial in capturing the perfect winter photo.
Lastly, don’t forget to experiment with different white balance settings to ensure the colors in your winter photos look true to life. Whether you’re shooting a snowy landscape or a cozy winter portrait, selecting the right white balance setting can make all the difference in your photos.
Mastering Exposure for Winter Scenes
Winter photography can be both challenging and rewarding, especially when it comes to exposure. The bright, reflective quality of snow and ice can often trick a camera’s light meter, leading to underexposed images. To master exposure in winter scenes, it’s important to understand how to properly adjust the camera settings for the best results.
First and foremost, it’s crucial to set the ISO to a lower number to prevent overexposure. In bright snowy landscapes, the natural light can cause the camera to compensate by darkening the exposure. By lowering the ISO, you can counteract this effect and capture the true brightness of the scene.
Next, pay attention to the shutter speed to prevent blurriness in winter scenes. With the lack of colorful foliage and wildlife, winter photography often relies on the texture and details of the snow and ice. To capture these intricate details, it’s essential to use a faster shutter speed to freeze the motion and prevent any blurriness.
Lastly, don’t forget about the aperture setting. By adjusting the aperture, you can control the depth of field in your winter photos, adding a sense of perspective and dimension to the scene. Choose a smaller aperture for a wider depth of field to capture the entire winter landscape in sharp focus, or a larger aperture for a more selective focus on specific elements of the scene.
Utilizing Natural Light and Reflections
When capturing winter scenes, utilizing natural light and reflections can make a huge difference in the quality of your photographs. Natural light during the winter months can have a soft, diffused quality, especially during the golden hours of sunrise and sunset. This type of light can add a beautiful warmth to your images, enhancing the overall mood and atmosphere.
Additionally, reflections can play a key role in winter photography. Whether it’s the reflection of a snowy landscape in a frozen lake or the glow of city lights bouncing off a layer of fresh snow, incorporating reflections into your compositions can add depth and visual interest to your photos.
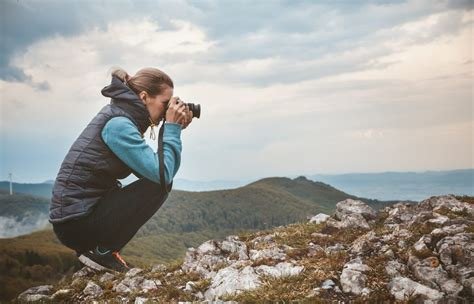
One effective technique for utilizing natural light and reflections is to position yourself strategically to capture the best possible light and reflections. This might involve adjusting your shooting angle or moving around to find the most compelling reflections in a scene. By taking the time to carefully consider the positioning of both yourself and your subject, you can create stunning images that truly showcase the beauty of winter.
Remember, photography is all about capturing light, and winter offers unique opportunities to explore the interplay between natural light and reflections. By paying attention to these elements and incorporating them thoughtfully into your compositions, you can elevate your winter photography to a whole new level.
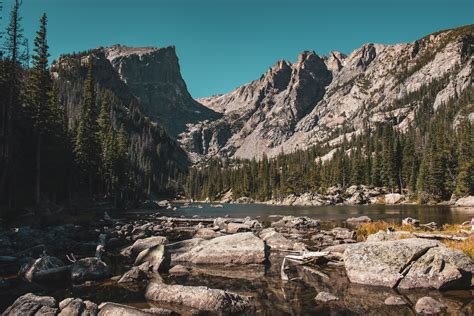
Creating Depth and Perspective in Winter Photography
When shooting winter photography, it’s important to consider how to create depth and perspective in your images. One way to achieve this is by using leading lines to draw the viewer’s eye into the scene. Look for natural elements such as roads, fences, or tree branches that can serve as leading lines in your composition. By positioning these elements in such a way that they lead towards your main subject, you can create a sense of depth in your photo.
Another technique for creating depth and perspective in winter photography is by including foreground elements. By incorporating objects such as rocks, fallen logs, or patches of snow in the foreground of your image, you can add visual interest and a sense of scale. This not only helps to create a three-dimensional feel, but also provides context for the viewer, helping them to feel more immersed in the scene.
Utilizing the rule of thirds can also help to create depth and perspective in your winter photos. By placing your main subject off-center, you can create a more dynamic composition that draws the viewer in and adds depth to the image. Additionally, consider incorporating elements such as mountains, trees, or buildings in the distance to provide a sense of scale and perspective in your winter photography.
Lastly, experimenting with different angles and viewpoints can enhance the depth and perspective in your winter photography. Try getting down low to capture the textures of the snow, or shooting from a higher vantage point to showcase the vastness of the winter landscape. By exploring various angles and perspectives, you can create compelling and dynamic winter photos that truly convey a sense of depth.
Capturing the Textures and Details of Snow
When photographing snowy landscapes, it’s important to pay attention to the textures and details of the snow in order to capture the beauty of the scene. One of the most essential things to keep in mind is the exposure settings. Snow can often appear gray in photos if the exposure isn’t adjusted properly, so it’s crucial to set the camera to a slightly overexposed setting to maintain the bright, white appearance of the snow. This will help to bring out the intricate details and textures of the snow-covered landscape.
Another important aspect to consider when capturing the textures and details of snow is the use of composition. By including elements such as trees, rocks, or other objects covered in snow, you can add depth and interest to your photos. Utilizing leading lines and diagonals can also help to draw the viewer’s eye into the image, highlighting the intricate details of the snow.
In addition, paying attention to lighting is crucial when photographing snow. The bright, reflective nature of snow can often cause harsh glares and shadows, which may obscure the intricate textures and details. Opt for softer, diffused light or take advantage of the golden hour to capture the snow in a warm, flattering light that accentuates its textures.
Lastly, getting up close and personal with the snow can reveal a whole new world of textures and details. Utilize a macro lens or the close-up setting on your camera to capture the individual snowflakes, icicles, and frost in exquisite detail, showcasing the unique textures and patterns that are often overlooked in winter landscapes.
Adding Warmth to Winter Photos through Composition
When capturing winter scenes, it can be challenging to convey the feeling of warmth and coziness through your photographs. However, by utilizing the right composition techniques, you can add a sense of warmth and comfort to your images, even in the midst of a cold and snowy landscape. One key aspect of adding warmth to winter photos is to focus on incorporating elements that convey a feeling of coziness and comfort.
One way to achieve this is by paying attention to the use of natural light and reflections in your composition. By capturing the soft, warm glow of the winter sun as it reflects off the snow or through the trees, you can create a sense of warmth and tranquility in your photos. Additionally, utilizing the contrast between light and shadow can add depth and dimension to your images, further enhancing the feeling of warmth in the scene.
Another important aspect of composition for adding warmth to winter photos is creating depth and perspective. By including elements in the foreground, middle ground, and background of your composition, you can add a sense of depth and dimension to your images. This can create a more immersive experience for the viewer and convey a greater feeling of warmth and coziness in the scene.
Furthermore, capturing the textures and details of snow can also contribute to the overall feeling of warmth in your winter photos. Whether it’s the delicate patterns of snowflakes, the soft blanket of freshly fallen snow, or the intricate details of an icy landscape, highlighting these textures can evoke a sense of comfort and familiarity, adding warmth to your images.
Frequently Asked Questions
What are some tips for choosing the right camera settings for winter photography?
For winter photography, it’s important to adjust your camera settings to account for the bright, reflective nature of snow. Use a low ISO to avoid overexposure, and consider using a small aperture for increased depth of field.
How can I master exposure for winter scenes in my photography?
To master exposure for winter scenes, it’s essential to pay attention to the histogram on your camera and adjust your exposure compensation as needed. Additionally, consider using spot metering to ensure the proper exposure for your main subject.
What are some tips for utilizing natural light and reflections in winter photography?
In winter photography, natural light and reflections can create stunning effects. Look for opportunities to capture the warm, golden hour light, and use reflective surfaces such as icy lakes or frost-covered windows to add visual interest to your photos.
How can I create depth and perspective in my winter photography?
To create depth and perspective in winter photography, consider incorporating elements such as leading lines, foreground objects, and varying textures. Additionally, using a wide-angle lens can help to emphasize the expansive, snowy landscapes.
What techniques can I use to capture the textures and details of snow in my photos?
To capture the textures and details of snow, try getting close to your subject and using a macro lens to emphasize intricate patterns and individual snowflakes. Experiment with different angles and compositions to highlight the unique qualities of snow.
How can I add warmth to my winter photos through composition?
To add warmth to winter photos, consider incorporating elements such as pops of color, contrasting textures, or the use of human subjects to convey a sense of coziness and emotion. Additionally, framing your subject with natural elements like tree branches or doorways can create a sense of intimacy in your photos.