Top DIY Tech Projects and Ideas for Tech Enthusiasts
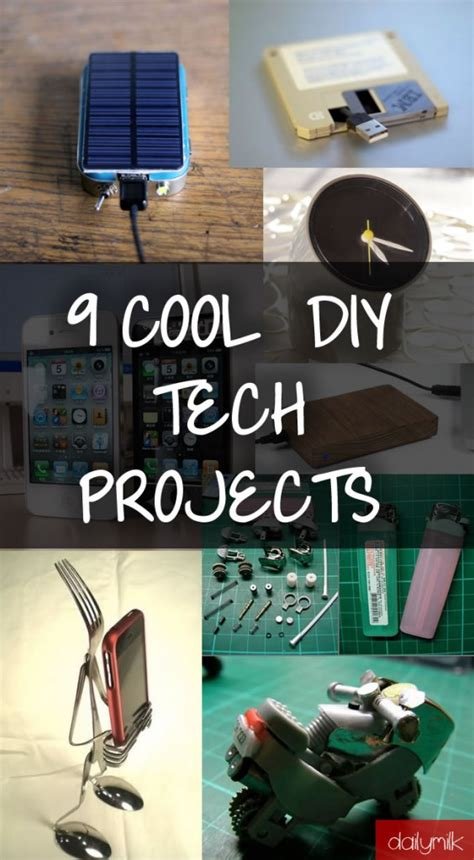
Are you a tech enthusiast looking for your next DIY project? Look no further! In this blog post, we will explore some of the top DIY tech projects and ideas that are perfect for those who love to tinker and create. From building your own Raspberry Pi media center to constructing a homemade drone for aerial photography, we’ve got you covered. Whether you’re interested in smart home automation, virtual reality, gaming, or 3D printing, there’s something here for everyone. So, roll up your sleeves, grab your tools, and get ready to unleash your creativity with these exciting DIY tech projects. Let’s dive in and explore the endless possibilities of creating your own tech gadgets and systems.
Creating Your Own Raspberry Pi Media Center
Are you tired of paying for cable or streaming subscriptions? With a Raspberry Pi, you can create your own media center and have access to all your favorite shows and movies for free.
Using Raspberry Pi as the foundation, you can install Kodi, an open-source media player software, and turn it into a powerful media center. With Kodi, you can play and stream media from the internet, local network, or local storage. You can also customize Kodi with various add-ons to enhance your viewing experience.
One of the best things about creating your own media center with Raspberry Pi is the cost-effectiveness. Raspberry Pi is an affordable mini computer that consumes very little power, making it an eco-friendly option for your entertainment needs. You can also personalize your media center by adding features such as a wireless keyboard or remote control for a convenient user experience.
Overall, building your own Raspberry Pi media center is a fun and rewarding project that allows you to enjoy endless entertainment without breaking the bank.
Building a Smart Home Automation System
Building a smart home automation system can be an exciting and challenging project for tech enthusiasts. With the advancement of technology, it is now possible to create a fully automated home environment that can be controlled remotely using a smartphone or other smart devices. From turning on lights and adjusting thermostats to monitoring security cameras and controlling entertainment systems, the possibilities are endless with a smart home automation system.
Before embarking on the journey of building a smart home automation system, it is essential to research and plan thoroughly. Determine the specific tasks and devices that you want to automate in your home. This could include lighting, heating and cooling, security systems, entertainment systems, and more. Understanding your requirements will help in selecting the right hardware and software components for your automation system.
Once you have identified your requirements, the next step is to choose the appropriate smart home automation technology and devices. There are various options available in the market, such as smart plugs, smart switches, smart thermostats, smart locks, and smart hubs. It is important to select devices that are compatible with each other and can be controlled using a central system or app.
After selecting the devices, the installation and configuration process begins. It is crucial to follow the manufacturer’s guidelines and instructions while installing the devices to ensure they function properly. Additionally, setting up the central control system and linking the devices to the system requires attention to detail to create a seamless smart home automation experience.
DIY Virtual Reality Headset with Cardboard
Virtual reality (VR) has become increasingly popular in recent years, with many people wanting to experience the immersive world of VR. However, the cost of a high-quality VR headset can be quite expensive. Luckily, with a little creativity and some basic materials, you can create your own DIY VR headset using cardboard.
One of the main components of a DIY VR headset is the lenses. You can purchase lenses online or remove them from an old pair of glasses. These lenses will help create the 3D effect and contribute to the immersive experience of VR.
Next, you will need to cut out a piece of cardboard to fit the lenses and hold them in place. This will form the main body of the VR headset. You can then add straps or padding to make it comfortable to wear, and create a slot for your smartphone to slide into.
Once you have assembled all the parts, you can download VR apps or games onto your smartphone and slide it into the headset. When you put on the DIY VR headset, you will be able to experience virtual reality without breaking the bank.
Designing and Building a Custom Gaming PC
Designing and building a custom gaming PC can be an exciting and rewarding project for anyone who loves gaming. From selecting the right components to putting it all together, the process of creating a custom gaming PC allows you to tailor your system to your specific gaming needs and preferences.
One of the key considerations when designing a custom gaming PC is choosing the right hardware. This includes selecting a powerful processor, a high-performance graphics card, ample RAM, and fast storage options. The components you choose will ultimately determine the performance and capabilities of your gaming PC.
Once you’ve selected all the necessary components, the building process begins. This involves carefully assembling the motherboard, processor, graphics card, RAM, storage drives, and the power supply unit inside the computer case. Attention to detail and precision is crucial to ensure everything fits together properly and functions as it should.
After the hardware is all put together, the last step is to install an operating system and any necessary drivers and software. From there, you can personalize your gaming PC with LED lighting, cable management, and other custom touches to make it truly your own.
Constructing a Homemade Drone for Aerial Photography
Are you interested in capturing stunning aerial photographs but don’t want to spend a fortune on a professional drone? With a bit of creativity and technical know-how, you can construct your very own homemade drone for aerial photography.
First, you’ll need to gather the necessary components, such as a lightweight frame, a powerful motor, propellers, a flight controller, and a high-quality camera. Once you have all the parts, you can start building your drone by carefully following online tutorials and assembly instructions.
Next, you’ll need to develop a basic understanding of drone flight principles and safety regulations. It’s crucial to practice flying your homemade drone in an open, obstacle-free area to avoid accidents and damage to the device.
Once you’ve mastered the basics, you can begin experimenting with different aerial photography techniques, from capturing breathtaking landscapes to documenting special events from a bird’s-eye view. With your homemade drone, the sky’s the limit when it comes to capturing unique and captivating aerial photographs.
Crafting a Bluetooth Speaker from Scratch
Crafting your own Bluetooth speaker from scratch can be a fun and rewarding project for any DIY enthusiast. Not only will you have the satisfaction of building something with your own hands, but you’ll also have a custom speaker that you can use to play your favorite tunes.
Before you start, you’ll need to gather the necessary components, including a Bluetooth module, speaker drivers, an amplifier board, and a power source. You can also get creative and choose a unique enclosure for your speaker, such as a vintage radio or a wooden box.
Once you have all the parts, you can begin assembling your Bluetooth speaker. This will involve connecting the components, soldering the wires, and testing the speaker to ensure that everything is working properly. You may also want to add additional features, such as LED lights or a volume control knob, to personalize your creation.
After your Bluetooth speaker is complete, you can enjoy using it to play music from your phone, tablet, or computer. Not only will you have a one-of-a-kind speaker, but you’ll also have the satisfaction of knowing that you built it yourself.
Developing a Home Security System with Raspberry Pi
When it comes to home security, technology has advanced to the point where you can create your own system using a Raspberry Pi. With the Raspberry Pi being a versatile and affordable microcomputer, it’s the perfect tool for building a customized home security system.
One of the key components of a home security system is surveillance. With a Raspberry Pi camera module, you can set up a video feed to monitor your home from anywhere in the world. Whether you’re at work or on vacation, you can keep an eye on your property using the live video stream.
In addition to surveillance, you can also implement motion sensors and alarms using the Raspberry Pi. By connecting these sensors to the Pi, you can receive alerts on your phone or email whenever there is unexpected movement in your home. This can provide peace of mind and an added layer of security.
Furthermore, you can integrate the home security system with other smart home devices such as smart locks and lights. This allows for a comprehensive approach to home security by creating a network of connected devices that work together to keep your home safe.
Building a Solar-Powered Phone Charger
Building a solar-powered phone charger can be a fun and eco-friendly project for anyone interested in DIY electronics. With the increasing use of smartphones, having a reliable and sustainable way to charge them is more important than ever. Fortunately, with some basic electronic components and a solar panel, it’s possible to create a portable and renewable energy source for your phone.
One of the key components of a solar-powered phone charger is, of course, the solar panel itself. These can be purchased online or at electronics stores, and come in a variety of sizes and power outputs. It’s important to choose a panel that is small enough to be portable, but still capable of generating enough power to charge a phone.
Once you have a solar panel, the next step is to incorporate it into a charging circuit. This typically involves a voltage regulator to ensure a steady and safe charging voltage for your phone’s battery. You may also need a charging controller to manage the flow of energy from the solar panel to the battery, and to prevent overcharging.
Finally, it’s important to consider the portability and durability of your solar-powered phone charger. You may want to build or buy a protective case for the electronic components, and ensure that the panel and battery are securely attached. With a little creativity and patience, you can create a reliable and sustainable way to keep your phone charged, no matter where you are.
DIY 3D Printer: From Concept to Creation
3D printing technology has gained popularity in recent years, allowing people to create intricate and complex objects from the comfort of their own homes. For those who are passionate about innovation and technology, building a DIY 3D printer from scratch can be a rewarding and educational experience. From conceptualizing the design to sourcing the necessary components, the journey of creating your own 3D printer can be challenging but ultimately fulfilling.
One of the first steps in creating a DIY 3D printer is to research and understand the basic principles behind 3D printing. This involves learning about the various types of 3D printing technologies, such as Fused Deposition Modeling (FDM) and Stereolithography (SLA), as well as familiarizing oneself with the mechanical and electronic components involved in the process. This foundational knowledge will serve as the building blocks for designing and constructing a functional 3D printer.
Once the groundwork has been laid, the next phase involves designing and prototyping the 3D printer. This requires careful consideration of the printer’s structure, mechanics, and electronics, as well as creating a detailed blueprint or CAD model of the machine. After finalizing the design, the next step is to source the necessary components, such as stepper motors, linear rails, and control boards, from reliable suppliers.
With the components in hand, the final stage of the process is the assembly and calibration of the 3D printer. This involves meticulously putting together the various parts of the machine, wiring the electronics, and fine-tuning the printer to ensure accurate and precise printing. While the process of building a DIY 3D printer may be challenging, the sense of accomplishment and the knowledge gained from the experience make it a worthwhile endeavor for any technology enthusiast.
Frequently Asked Questions
What are some projects for tech enthusiasts in your blog post?
The projects include creating a Raspberry Pi Media Center, building a Smart Home Automation System, making a DIY Virtual Reality Headset with Cardboard, designing and building a Custom Gaming PC, constructing a Homemade Drone for Aerial Photography, crafting a Bluetooth Speaker from Scratch, developing a Home Security System with Raspberry Pi, building a Solar-Powered Phone Charger, and making a DIY 3D Printer.
How can I create my own Raspberry Pi Media Center?
You can create your own Raspberry Pi Media Center by following the steps and guidelines mentioned in the blog post. It includes assembling the necessary hardware components, installing the required software, and setting up the media center for streaming and entertainment purposes.
What are the steps for building a Smart Home Automation System?
The steps for building a Smart Home Automation System are outlined in the blog post and involve choosing the right smart devices, setting up a central hub, connecting the devices to the hub, and using a compatible app or voice control to manage the automation system.
How can I craft a Bluetooth Speaker from scratch?
Crafting a Bluetooth Speaker from scratch involves selecting the components, assembling the parts, and configuring the Bluetooth connectivity. The blog post provides detailed instructions for creating a customized and functional Bluetooth Speaker.
What is the process for developing a Home Security System with Raspberry Pi?
The process for developing a Home Security System with Raspberry Pi is explained in the blog post and includes setting up a Raspberry Pi board, installing security software, integrating cameras and sensors, and connecting to a monitoring interface for remote access and surveillance.
What are the essential steps for building a Solar-Powered Phone Charger?
The blog post covers the essential steps for building a Solar-Powered Phone Charger, which include choosing the solar panels, designing a charging circuit, assembling the components, and testing the charger for efficiency and effectiveness.
Can I learn about making a DIY 3D Printer in your blog post?
Yes, the blog post provides insights into the concept and creation of a DIY 3D Printer, including the necessary components, building instructions, and tips for calibrating and using the homemade 3D Printer.