How to Carve the Perfect Pumpkin: Tips and Ideas for Jack-O’-Lanterns
The Halloween season is upon us, and that means it’s time to start thinking about carving the perfect pumpkin. Whether you’re a seasoned pro or a beginner, creating a stunning jack-o’-lantern can be a fun and rewarding experience. In this blog post, we’ll cover everything you need to know to carve the perfect pumpkin, from choosing the right variety to preserving your masterpiece for longer. With tips on prepping your pumpkin, essential carving tools, mastering basic techniques, and even creative and unique jack-o’-lantern ideas, you’ll be well-equipped to create a show-stopping pumpkin this Halloween. So, grab your pumpkin and get ready to unleash your creativity as we dive into the art of pumpkin carving.
Choosing the right pumpkin variety
When it comes to choosing the right pumpkin variety for your carving project, there are several factors to consider. First and foremost, you’ll want to select a pumpkin that is fresh and free from any blemishes or soft spots. Look for a pumpkin that has a sturdy stem and feels heavy for its size, as this indicates a thick and juicy interior. Additionally, consider the size and shape of the pumpkin – larger pumpkins are great for intricate designs, while smaller pumpkins are better suited for simple carvings. Finally, think about the color of the pumpkin – whether you prefer a vibrant orange or a more muted hue, there are plenty of options to choose from.
One popular variety of pumpkin for carving is the Jack-o’-lantern pumpkin, known for its classic round shape and deep orange color. These pumpkins are readily available at most grocery stores and pumpkin patches, making them a convenient option for many carvers. If you’re looking for something a bit more unique, consider seeking out a Cinderella pumpkin, with its flattened shape and vibrant, reddish-orange color. This variety can add a whimsical touch to your pumpkin display and is perfect for more artistic designs.
For those who want to take their pumpkin carving to the next level, consider trying out a White Ghost pumpkin. As the name suggests, this variety is a pale white color, which provides a striking backdrop for intricate carvings. The unique color also makes it stand out among traditional orange pumpkins, adding a fresh and modern twist to your Halloween décor. Another interesting option is the Blue Moon pumpkin, with its smooth, bluish-gray skin. This variety offers a mysterious and enchanting look, perfect for creating spooky and atmospheric jack-o’-lanterns.
Ultimately, the right pumpkin variety for your carving project will depend on your personal preferences and the specific design you have in mind. Whether you opt for a classic Jack-o’-lantern pumpkin or choose a more unusual variety, the most important thing is to have fun and unleash your creativity. With the perfect pumpkin in hand, you’ll be well on your way to creating a show-stopping and memorable Halloween display.
Prepping your pumpkin for carving
Before you start carving your pumpkin, it’s important to choose the right pumpkin variety. Look for a pumpkin with a stable base and a smooth, even surface to make carving easier and safer. A larger pumpkin will give you more space to work with, but be mindful of its weight if you are planning to display it indoors. Once you’ve selected the perfect pumpkin, it’s time to start prepping it for carving.
First, gather all the necessary tools for carving. You’ll need a sharp paring knife or a pumpkin carving kit, a large spoon or ice cream scoop for removing the seeds and pulp, and a marker or pencil for outlining your design. It’s also a good idea to lay down newspaper or a disposable tablecloth to make cleanup easier.
Next, carefully cut a hole in the top of the pumpkin using a circular motion to create a lid. Be sure to angle the cut slightly inward to prevent the lid from falling into the pumpkin later. Once the lid is removed, scoop out the seeds and pulp using your spoon or scoop. This can be a messy process, but taking the time to remove as much of the stringy pulp as possible will help preserve your carved design for longer.
After the inside of the pumpkin is cleaned out, you can begin transferring your design onto the pumpkin’s surface. Use a marker or pencil to trace your design, making sure to leave enough space between each line to ensure easy carving. Once your design is outlined, carefully carve along the lines using a sawing motion with your knife or carving tool. Take your time and work slowly to prevent any mistakes.
Essential tools for pumpkin carving
When it comes to carving the perfect pumpkin for Halloween, having the right tools can make all the difference. One essential tool for pumpkin carving is a sharp serrated knife, which will make it easier to cut through the tough outer skin of the pumpkin. A small serrated knife is also useful for carving intricate details and patterns.
Another essential tool for pumpkin carving is a large spoon or scoop for removing the seeds and pulp from the inside of the pumpkin. A sturdy metal spoon works best for this task, as it can easily scrape away the stringy insides of the pumpkin without bending or breaking.
For more detailed work, a set of carving tools with different shapes and sizes can be extremely useful. These tools typically include small saws, scoops, and poker tools that are designed specifically for carving pumpkins. They allow for more intricate designs and finer details than a traditional knife.
Finally, having a sturdy surface to work on is an essential tool for pumpkin carving. Whether it’s a table or a large cutting board, a stable surface will make it easier to carve and less likely for accidents to occur. With these essential tools in hand, you’ll be well-prepared to create a masterpiece this Halloween.
Mastering basic pumpkin carving techniques
When you’re ready to take your pumpkin carving skills to the next level, it’s important to master some basic techniques that will help you create intricate and impressive designs.
One essential technique is to carefully plan your design before making any cuts. Use a marker or pencil to sketch out your design on the pumpkin’s surface, making sure to include all the details you want to carve.
Next, make sure to have the right tools on hand. A sharp serrated knife will help you make precise cuts, while a smaller paring knife can be useful for more intricate details. A scoop or large spoon will also come in handy for removing the pumpkin’s seeds and pulp.
Another important technique to master is controlling the depth of your cuts. Be sure to use varying levels of pressure when carving to create different depths, which will add dimension and texture to your design.
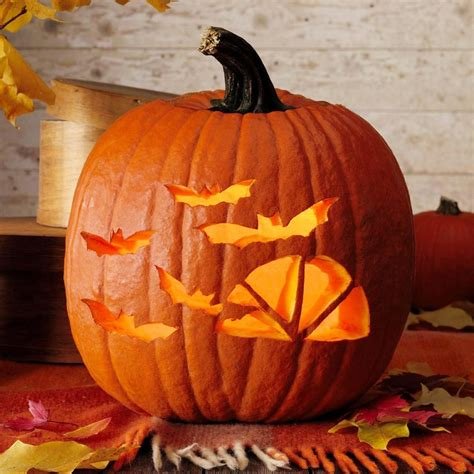
Creative and unique jack-o’-lantern ideas
When it comes to carving pumpkins for Halloween, the possibilities are endless. One unique idea for a jack-o’-lantern is to create a multi-faced pumpkin. Instead of the traditional single face carving, try slicing the pumpkin in different sections and carving a unique face or design on each section. This will give your pumpkin a one-of-a-kind look that is sure to stand out in your Halloween display.
Another creative jack-o’-lantern idea is to use stencils to create intricate designs on your pumpkin. You can find a wide variety of pumpkin carving stencils online, ranging from simple designs to intricate patterns. This allows you to create a pumpkin that is truly unique and showcases your artistic abilities.
If you want to take your jack-o’-lantern to the next level, consider adding different materials to your pumpkin carving. For example, you can use small LED lights to create a glowing effect inside the pumpkin, or incorporate other materials such as paint, glitter, or fabric to add texture and dimension to your design.
Lastly, think outside the box when it comes to choosing the shape of your pumpkin. Instead of the traditional round pumpkin, look for unusual or quirky shapes that will add visual interest to your jack-o’-lantern. Whether it’s a tall, elongated pumpkin or a squat, chubby one, different shapes can make your pumpkin carving truly unique.
Preserving your carved pumpkin for longer
After putting in the time and effort to create a masterpiece out of your pumpkin, it’s important to ensure that it lasts as long as possible. Preserving your carved pumpkin for longer not only allows you to enjoy your creation for an extended period of time, but also prevents it from becoming a mushy mess too soon.
One way to preserve your carved pumpkin is by keeping it cool and dry. Make sure to store it in a cool, dry place when it’s not on display. This could be in a refrigerator or a well-ventilated area, away from direct sunlight and moisture. This will help slow down the decaying process and keep your pumpkin looking fresh for longer.
Another effective method for preserving your carved pumpkin is by applying a preservation solution. There are various commercial pumpkin preservation sprays available that are designed to help prolong the life of a carved pumpkin. These sprays work by sealing in moisture and preventing mold and bacteria from forming on the surface of the pumpkin.
Clean and maintain your carved pumpkin regularly to ensure its longevity. Remove any dirt, debris, or mold that may have accumulated on the surface. This will not only help maintain the appearance of your pumpkin, but also prevent the spread of decay.
Frequently Asked Questions
How should I choose the right pumpkin variety for carving?
Answer: When choosing a pumpkin for carving, look for one that is fresh, firm, and has a smooth surface. It’s also important to pick a pumpkin with a flat bottom to ensure stability during carving.
What are the essential tools for pumpkin carving?
Answer: The essential tools for pumpkin carving include a sharp knife or pumpkin carving tools, a spoon for scooping out the pumpkin seeds and pulp, and a marker for drawing your design onto the pumpkin.
What are some basic pumpkin carving techniques I should know?
Answer: Some basic pumpkin carving techniques include creating a lid by cutting around the stem and angling the knife inward, scooping out the pumpkin’s seeds and pulp, and using a gentle sawing motion to carve out your design.
Can you give me some creative and unique jack-o’-lantern ideas?
Answer: Some creative and unique jack-o’-lantern ideas include carving intricate designs, using stencils for precise patterns, or incorporating different carving depths for added dimension.
How can I preserve my carved pumpkin for longer?
Answer: To preserve your carved pumpkin for longer, you can apply petroleum jelly or a vegetable oil to the carved edges to seal in moisture, and keep your pumpkin in a cool, dry place when not on display.
How should I prep my pumpkin for carving?
Answer: When prepping your pumpkin for carving, start by thoroughly cleaning the exterior with a damp cloth and mild soap to remove any dirt or debris. Then, cut a hole in the top or bottom and scoop out the seeds and pulp with a spoon.
What are some tips and ideas for carving the perfect pumpkin?
Answer: When carving the perfect pumpkin, it’s essential to have a well-designed plan, use the right tools, and take your time. Additionally, consider incorporating different textures, depths, and shading to bring your design to life.