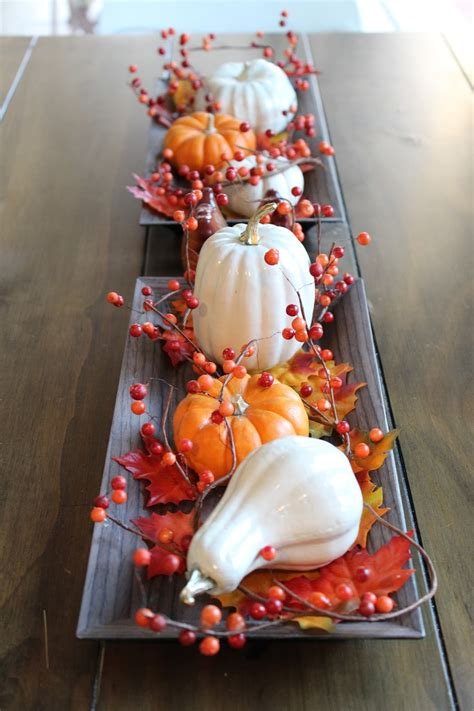
Fall Harvest Crafts: DIY Decorations and Centerpieces for Thanksgiving
As the fall season approaches and Thanksgiving draws near, it’s the perfect time to start thinking about how to add some festive flair to your home. With the abundance of natural elements and colors that come with the fall harvest, there are plenty of opportunities for DIY decorations and centerpieces that will bring the spirit of the season into your home. From creating beautiful wreaths for your front door to crafting adorable scarecrow decorations for your garden, the possibilities are endless. In this blog post, we’ll explore a variety of fall harvest crafts that will help you add a touch of warmth and charm to your home this Thanksgiving. Whether you’re looking to create a cozy ambiance with leaf-themed candles or add a natural touch with rustic pinecone garlands, these DIY projects are sure to inspire your creativity and help you celebrate the beauty of the fall season.
Creating festive fall wreaths for your front door
When the air gets crisp and the leaves start to change, it’s the perfect time to bring some festive fall decor to your front door. One of the best ways to do this is by creating your own fall wreath.
Using autumnal colors such as reds, oranges, and yellows, you can craft a beautiful wreath that captures the essence of the season. Whether you choose to use silk flowers, leaves, or natural materials such as pinecones and berries, the options are endless when it comes to designing your wreath.
Not only is making your own wreath a fun and creative project, but it also adds a personal touch to your home’s exterior. You can tailor the design to match your own unique style, whether that’s a classic, elegant look or a more whimsical and rustic feel.
By hanging a festive fall wreath on your front door, you’ll be sure to welcome the season with a warm and inviting touch that will be appreciated by all who pass by.
Crafting beautiful cornucopias as table centerpieces
When it comes to creating a stunning table centerpiece, cornucopias are a classic choice that never goes out of style. These iconic horn-shaped baskets are traditionally filled with an assortment of fruits, vegetables, and flowers, making them the perfect addition to any festive occasion.
To start crafting your own beautiful cornucopia centerpiece, begin by selecting a wicker cornucopia basket in a size that suits your table. Next, gather an array of seasonal produce and foliage to fill the basket. Consider using items such as pumpkins, gourds, squash, and fall leaves to capture the essence of autumn.
Once you have gathered your materials, carefully arrange them inside the cornucopia, ensuring that the colors and textures are balanced. Be sure to fill any gaps with additional foliage to create a full and lush appearance. You can also add in some fresh flowers for a touch of elegance.
Finally, place your finished cornucopia centerpiece in the center of your table and admire the beauty and abundance it brings to your decor. Whether you’re hosting a Thanksgiving dinner, a fall harvest party, or simply want to add a touch of seasonal charm to your home, a handcrafted cornucopia centerpiece is sure to impress your guests and infuse your space with warmth and beauty.
Designing leaf-themed candles for a cozy ambiance
When the weather starts to cool and the leaves begin to change, it’s the perfect time to bring a cozy ambiance into your home with leaf-themed candles. Whether you are looking to add a touch of autumn to your living space or create a warm and inviting atmosphere for a special occasion, designing leaf-themed candles can be a fun and creative way to achieve the cozy ambiance you desire.
One way to create leaf-themed candles is to use real leaves as a decorative element. By pressing leaves onto the surface of a candle and then gently removing them, you can create a beautiful, natural pattern that will add a touch of nature to your home decor. You can also use a variety of different colored leaves to create a unique and eye-catching design that reflects the colors of the season.
If you prefer a more subtle approach, you can use leaf-shaped molds to create your own leaf-themed candles. By using a wax blend that includes autumnal scents such as cinnamon, vanilla, and pumpkin spice, you can create a warm and inviting aroma that will enhance the cozy ambiance of your space. You can also experiment with different colors and textures to create candles that reflect the beauty of fall.
Whether you choose to create leaf-themed candles using real leaves or molds, the end result is sure to add a touch of warmth and charm to your home. By incorporating these candles into your decor, you can create a cozy and inviting atmosphere that will make your space feel like a haven from the chilly weather outside.
Making adorable scarecrow decorations for your garden
Are you looking to add a touch of whimsy to your garden? Why not try making adorable scarecrow decorations to brighten up your outdoor space this fall season? These charming and friendly scarecrows can help protect your garden from pesky pests while also adding a fun and festive touch to your yard.
Start by gathering the materials you’ll need for this project. You’ll want to find some old clothes, such as jeans, flannel shirts, and hats, as well as straw or other stuffing material. Additionally, you’ll need some fabric for the scarecrow’s face, markers for drawing on the face, and some twine or rope to tie everything together.
Once you’ve gathered your materials, it’s time to assemble your scarecrow. Start by stuffing the clothes with straw or other filling to give them a plump and lifelike appearance. Use the twine or rope to tie off the ends of the clothing to create a head, body, and arms. Then, use the fabric and markers to create a friendly face for your scarecrow.
Finally, set up your scarecrow in your garden, using a wooden stake or pole to support it. You can also get creative by adding accessories like a straw hat, a plaid scarf, or a rake for an added touch of realism. Your adorable scarecrow decorations will not only add charm to your garden but also serve as a functional way to protect your plants from unwanted pests.
Constructing pumpkin-themed place card holders for dinner parties
When it comes to hosting a dinner party, the little details often make the biggest impact. That’s why creating pumpkin-themed place card holders can add a special touch to your table setting.
Start by gathering small pumpkins in various sizes. You can choose traditional orange pumpkins or mix it up with white or even heirloom varieties for a unique look.
Next, carefully carve a small slit in the top of each pumpkin to hold the place card. This can be done with a small knife or a pumpkin carving tool. Be sure to carve at a slight angle to ensure the card sits at a readable angle.
After carving the slit, you can decorate the pumpkins with paint, glitter, or other embellishments to match your dinner party’s theme or color scheme. Finally, place the name cards in the slits and arrange the pumpkins on your table for an elegant and personalized touch.
Assembling rustic pinecone garlands for a natural touch
Do you want to add a touch of nature to your home decor this fall? Look no further than rustic pinecone garlands. These simple yet beautiful decorations are perfect for bringing the outdoors inside and creating a cozy, natural ambiance in your living space. Whether you’re decorating for a fall party or simply want to add some seasonal charm to your home, rustic pinecone garlands are a versatile and budget-friendly option.
First, gather your materials. You will need an assortment of pinecones in various sizes, some twine or string, and a hot glue gun. Look for pinecones with interesting textures and shapes to add visual interest to your garland.
Next, it’s time to get creative! Lay out your pinecones and start experimenting with different arrangements. You can mix and match sizes and shapes to create a visually appealing garland that reflects the beauty of nature. Once you’re happy with the arrangement, use hot glue to secure the pinecones to the twine. Be sure to let the glue dry completely before hanging your garland to ensure everything stays in place.
Once your rustic pinecone garland is complete, you can hang it above a doorway, along a mantle, or use it as a centerpiece for a seasonal table setting. Its natural, earthy look will instantly add warmth and charm to any space, making it the perfect addition to your fall decor. Plus, the best part about creating your own garland is that you can customize it to fit your style and decor preferences.
Frequently Asked Questions
What materials are needed to create a fall wreath for the front door?
To create a fall wreath for the front door, you will need a wreath form, faux fall foliage and flowers, wire cutters, and a hot glue gun.
How can I make cornucopias for Thanksgiving table centerpieces?
To make cornucopias for Thanksgiving table centerpieces, you will need cornucopia molds, assorted fall fruits and vegetables, floral foam, and decorative ribbon.
What steps are involved in designing leaf-themed candles for a cozy ambiance?
To design leaf-themed candles for a cozy ambiance, choose large fall leaves, candle wax, wicks, and essential oil for fragrance. Melt the wax, dip the leaves, and let them dry before attaching to the candle.
What materials are needed to make adorable scarecrow decorations for the garden?
To make adorable scarecrow decorations for the garden, gather some old clothes, straw or hay, a large stick for the body, and a burlap sack for the head.
How can I construct pumpkin-themed place card holders for dinner parties?
To construct pumpkin-themed place card holders for dinner parties, you will need small pumpkins, a knife or carving tools, and small cards with guests’ names.
What is the process for assembling rustic pinecone garlands for a natural touch?
To assemble rustic pinecone garlands for a natural touch, gather pinecones, twine or string, and hot glue. Attach the pinecones to the twine using the hot glue, spacing them evenly


